How do you organize content on public facing Omeka websites? This is among the most recurring questions raised by attendees of the Introduction to Omeka workshop offered by GCDI over the past two years. For example, one student working on a digital archive of European sculptures wanted to provide an artist directory for users to browse. Another student, working on a digital catalogue of historical architectural photos from the city of Providence, wanted to facilitate browsing by neighborhood. The goal of this post is to suggest some possibilities offered by Omeka and Omeka S to display and sort content. Included throughout are links to examples from various Omeka projects.
Collections
One way to organize your collection’s content is by adding them to the same Collection (Omeka Classic) or Item Sets (Omeka S).
Collections are ways of organizing items, rather like file folders on your computer, or like collections in archives such as “Manuscripts by Jack Kerouac, 1952-1969” in the Special Collections of the New York Beats Archive (please note, I just made this up). Collections provide a way to gather your items into separate, logically coherent groups. In Omeka Classic, items do not have to be in collections, but once an item is in a collection, you cannot change it. As the Omeka documentation explains: “The concept of Omeka collections originates from museum and archives collections; one cannot put a document into more than one box” – so, if you want to add a Picasso painting in your archive to both a “Cubism” and a “20th Century” collections, you will not be able to do that. Example from the City of Boston Archives.
Omeka S, by contrast, does allow the possibility to add items to more than one collection, which are called “Item Sets”. Depending on the taxonomy that you decide to create for your artifacts, you could create multiple Item Sets and organize your content accordingly. In this case, you would be able to add an Item to both an Item Set that matches artistic movement (say, Cubism) and one for period (e.g., “20th Century”). Example from NEPTUNE.
Tags
Organize your collection’s content using tags. In Omeka Classic, you can do this natively; in Omeka S, via the Folksonomy Tag or Metadata Browse modules.
Tags are keywords or phrases that describe a piece of data and allow you to link your entries together. They are non-hierarchical labels that classify your content so that it can be easily found. Adding tags to your Omeka/Omeka S items will allow your users to search/browse your archive by them.
Please note, not only Items, but also Collections/Item Sets and Exhibitions can be tagged.
Example 1 from the 9/11 Living Memorial Digital Archive, and Example 2 from the Abbot Collections.
Query Strings
Organize your collection’s content via query strings. In Omeka Classic, via the Simple Pages plugin; in Omeka S, natively.
This option requires creating a set of customized URLs with a specific query. For example, say you are working on an archive of unpublished manuscripts of Beat poets, and you want to display your results aggregated by Author.
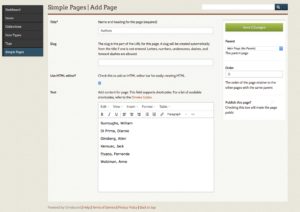
First, create a static page with an alphabetical list of authors in your collection, mimicking a library index.

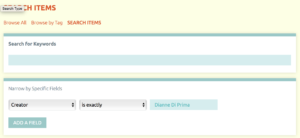
Second, create a query (e.g., search your Omeka site) for all the items for which the Dublin Core field “Creator” is equal to “Dianne Di Prima”.
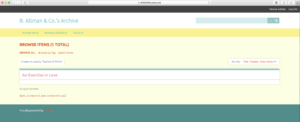
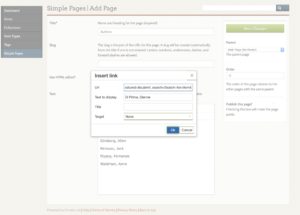
Then, once you have completed your search, you can then copy the url from your browser’s address bar and use it to create a hyperlink in your static page, in correspondence to “Di Prima, Dianne.”
Finally, repeat this process for all your authors.
Example 1 from L’Arxiu de la Paraula de l’Ateneu Barcelonès (by period), Example 2 from the New Roots / Nueva Raices project (by location).
Exhibitions
Another option is to create Exhibitions to organize your content. In Omeka Classic, you’d do so via the Exhibition Builder plugin; in Omeka S, you can do this natively.
You can create an exhibition for each of your categories – say, each artist, each movement, each period – in addition to displaying a selection (or all!) the items belonging to an artist, each exhibition can also provide text and static content.
Example from the University of Tasmania’s Cultural Collections.
Maps
Organize your content geographically. In Omeka Classic, via the Neatline plugin; in Omeka S, via the Neatline S or Mapping modules).
This option is a bit tricky, and I have never pursued it myself – but the Neatline website offers extensive documentation that includes valuable tutorials and a set of examples.
Example 1 from the American Merchant Marine Veterans Oral History Project, and Example 2 from Ainmean-Aite Asainte.
These are not your only options – for example, another possibility is to organize your collection’s content by linking Omeka Resources to one another (S) – but it should be a good start. If you find any Omeka site (here are some samples for Omeka Classic and Omeka S) that organizes objects in a way that seems to be working better for you, try and reverse-engineer it. And come talk to us about it during Office Hours!
Featured Image Credits: CreVis2 via iStockphoto


